
When you first create a website on eQPress, what you need to know is how to configure it and how to use WordPress. But if you’ve ever managed a WordPress-based website or blog and/or have just migrated your existing site to eQPress, you will probably be already familiar with the WordPress Dashboard and don’t need any introduction to its usage.
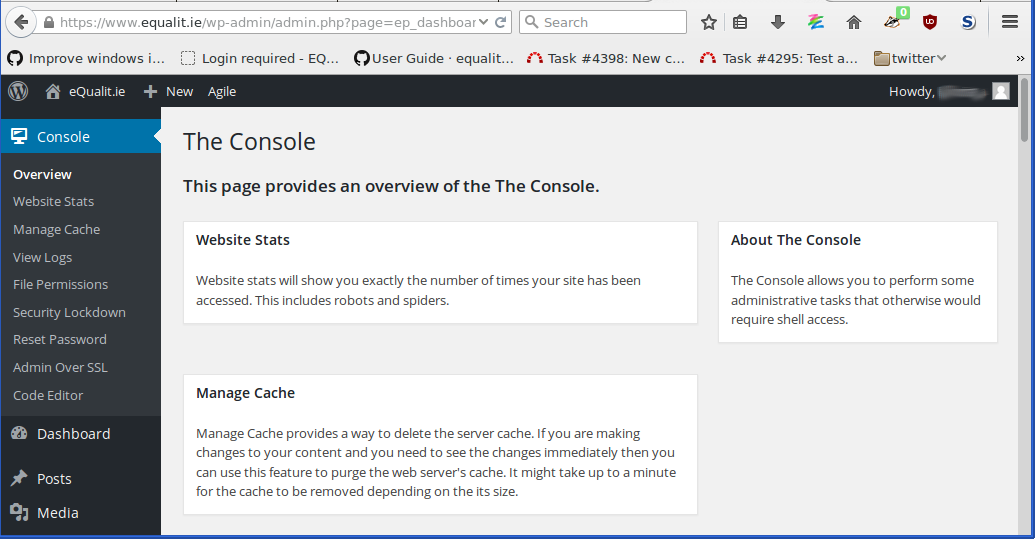
What you will find different in the eQPress administration panel, though, is the Console – an additional administration panel that enhances the functionalities of the common WordPress admin interface. Through the Console, you can perform some administrative tasks that would otherwise require shell access, like changing some settings that would be complicated to edit otherwise and enhancing the security of your website.
By accessing the Console, you will be able to:
- view statistics for your website;
- delete your server cache;
- view logs;
- change file permissions;
- reset your SFTP password;
- enable or disable SSL for login and admin screens;
- disable or enable your Plugin and Theme Editor.
To access this interface, click “Console” in the sidebar on the left of your WordPress admin panel.
View your statistics
In the “Website Stats” section of the Console, you can view the exact number of times your site has been accessed in the last few months (“Monthly Stats”) and days (“Recent Daily Stats”), with a highlight on the busiest day your website has recorded. Please, note that robots and spiders are also included in the total number.

Click “Website Stats” in the Console menu in the left-hand sidebar and then click the “Show Web Stats” button: after a moment your monthly and daily statistics will be visualized, including: the number of visited pages (“Hits”); the number of visits and unique visitors, and the amount of transferred data (“Transferred”).
This tool is a good compromise if you want to monitor how your website is doing in terms of traffic and engagement without violating your visitors’ privacy. By installing a specific plugin for statistics, you would have a more precise vision of your public, but most of these plugins often track users for commercial purposes. Please, consider what risks this might imply for your visitors before you decide to install additional plugins for statistics.
Delete the server cache
The “Manage Cache” section provides you a way to delete the server cache.
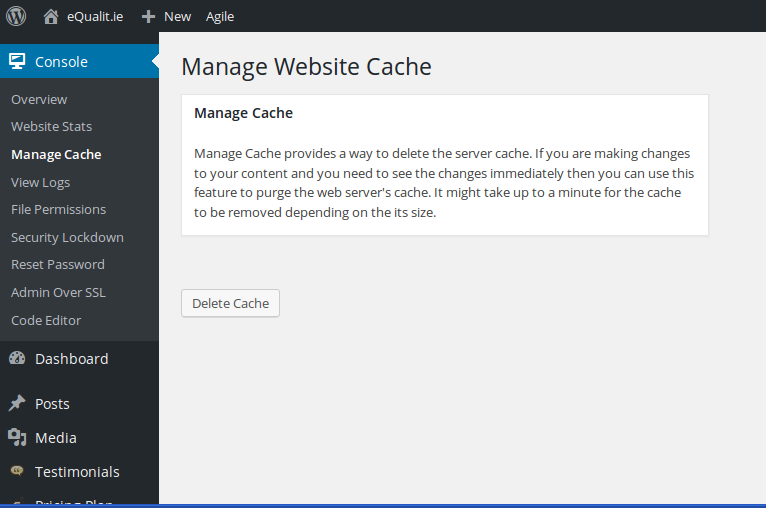
If you are making changes to your content and need to see them immediately, you can use this feature to purge the web server’s cache. Just click the “Delete cache” button and wait a bit: it might take up to a minute for the cache to be removed depending on its size.

View web and PHP logs
By clicking on “View Logs” in the Console sidebar, you will be able to view the following log files:
- PHP error log – contains a record of all PHP errors produced by plugins and themes.
- Web server access log – contains a record of every file transferred from your site.
- Web server error log – contains a record of every error encountered by the web server.

To view each of these logs, click the respective button.
Reset your file permissions
The “File Permissions” feature allows you to reset the permissions and ownership on your files back to the default settings: by clicking the “Reset Now” button, you will reset all directories and files under your document root to be owned by the web server user.
You may want to use this feature because sometimes, after uploading or installing a plugin manually, you may need to change its permissions for it to work properly. Since you have uploaded the plugin through your SFTP account, that directory is owned by your SFTP user, which is different from the web server user that is making your website, together with the installed plugins, work. So when the plugin tries to write to a file or directory that is owned by your SFTP user, it fails because the web server user is trying to change something it doesn’t have the permission to change.
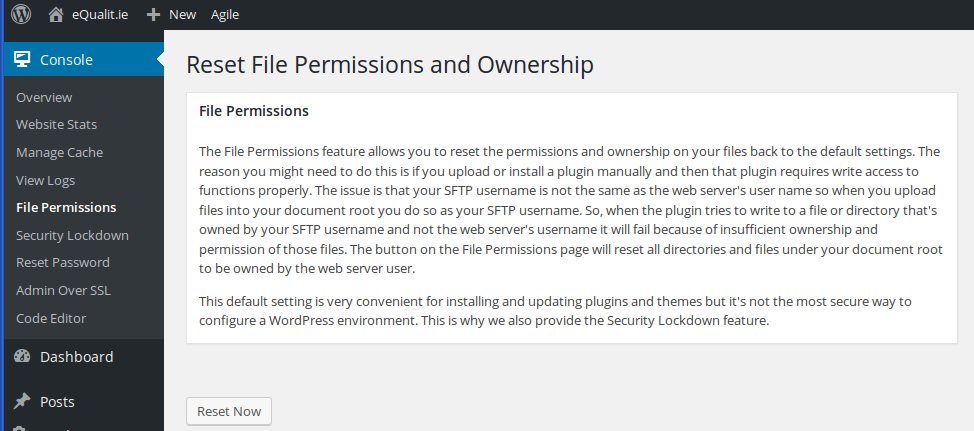
This default setting is very convenient for installing and updating plugins and themes but is not the most secure way to configure a WordPress environment. This is why the Console also includes a “Security Lockdown” feature.

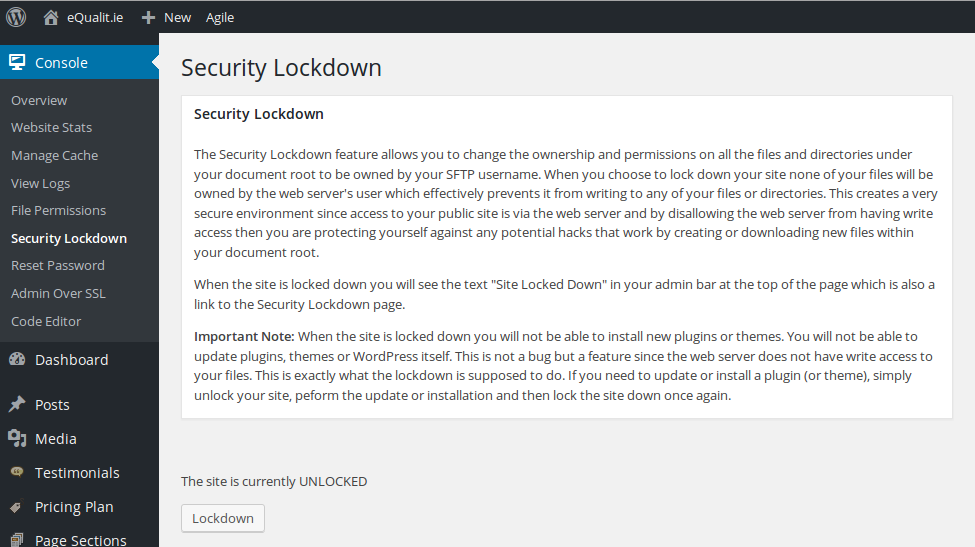
Protect your website from hacks with the Security Lockdown
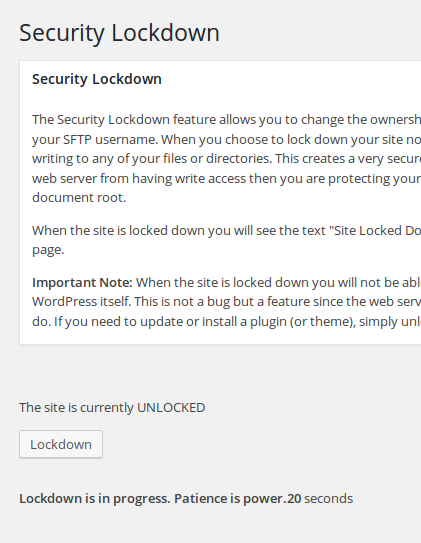
You can use the “Security Lockdown” feature of your eQPress Console to secure your website from potential hacks that try to create or download new files in your SFTP root directory in order to take control of your site and/or of your server. This risk can be prevented by stopping the web server from writing to any of your files or directories, which is what happens if those files are owned by a user different from the web server user.
The Security Lockdown feature does just that: it allows you to change the permissions and assign the ownership of all the files and directories under your document root to your SFTP user. If you want to protect your website from this kind of hacks, click the “Lockdown” button and wait for the changes to take effect before you leave the page. Once the process is completed, none of your files will be owned by the web server user, which will effectively prevent it from writing to any of your files or directories.
 |
 |
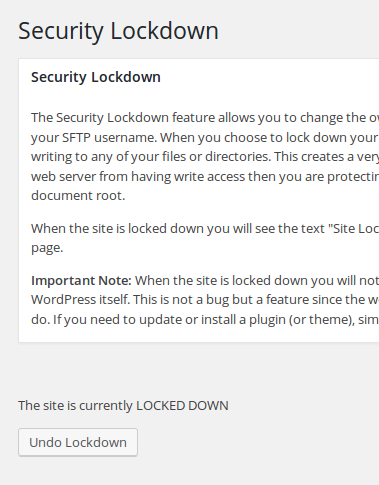 |
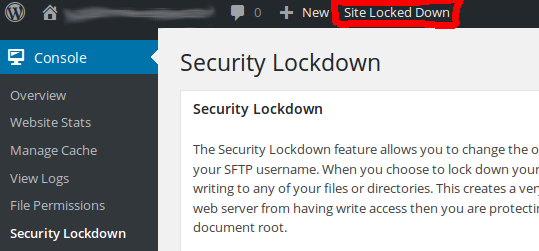
When the site is locked down, you will see the text “Site Locked Down” in your admin bar at the top of the page. This is also a link to the “Security Lockdown” section of the Console.
Important: When the site is locked down, you will not be able to install new plugins or themes. You will not be able to update plugins, themes or WordPress itself. This is not a bug, but a feature: it’s exactly what the Security Lockdown is supposed to do. If you need to update or install a plugin (or theme), simply unlock your site, perform the update or installation and then lock the site down once again.
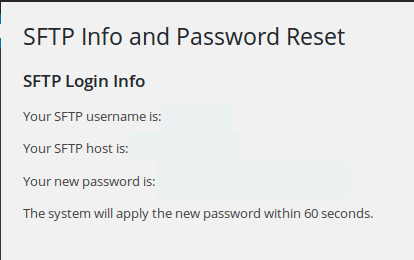
SFTP info and password reset
By clicking on “Reset Password” in the Console sidebar, you will access a panel with information on your SFTP user name and host. You can access this page in case you need to find quickly the SFTP credentials you received by email when your eQPress account was activated, or to check that the host address hasn’t changed.

The “Reset Password” section of the Console also gives you the possibility of resetting your SFTP password: by clicking the “Reset Password” button in this page, you will change your SFTP password and the new password will be temporarily visualized under the line with your SFTP host, as well as sent to you by email.
Please note: If what you want to change is not your SFTP password but your WordPress admin password, click on your user name in the right end of the admin bar at the top of the WordPress panel to open your Profile page, and then click the button “Generate Password” in the Account Management section: a new password will be generated for your WordPress user. Make sure to store this password in a secure place: the best way to do this is to use a password manager like KeePass. To change your database password, read this guide.
Protect your login and admin panel with SSL
SSL provides confidentiality between your browser and the web server. By encrypting the communication between you and the server, you are making it very difficult for malicious hackers to steal your private information. If you use SSL, credentials such as user names and passwords will be undecipherable if they are intercepted while in transit. The same applies to your authentication tokens, such as the cookies that are sent every time you view or make changes via the admin panel.
The Console offers you 3 choices when configuring WordPress to use SSL. To change the settings, click the relevant button and wait for the process to be finished before you leave the page.
| 1. Enable SSL for logins and all admin screens. This is the most secure choice, and will protect both your access credentials and your connection to the server through the admin panel. |
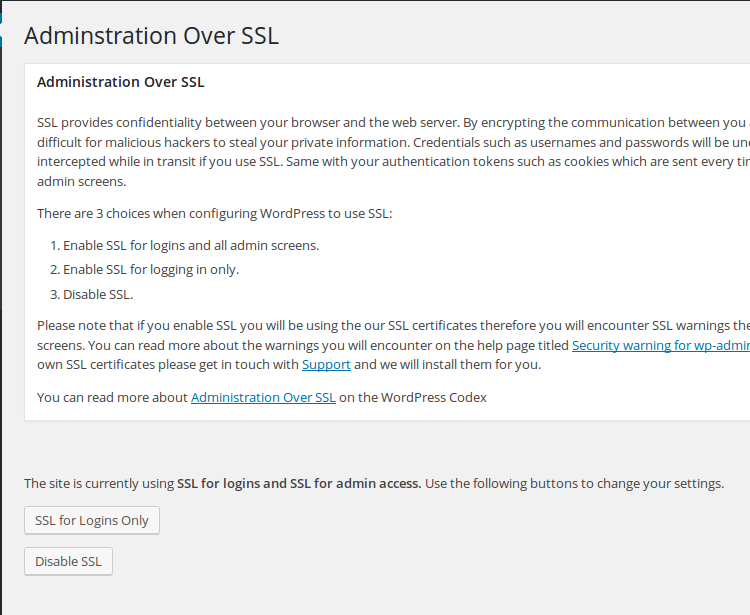 |
| 2. Enable SSL for logging in only. This choice will protect your credentials from being intercepted when you log into the eQPress admin panel. |
 |
| 3. Disable SSL. If you choose to disable SSL, your connection to the server will not be protected. |
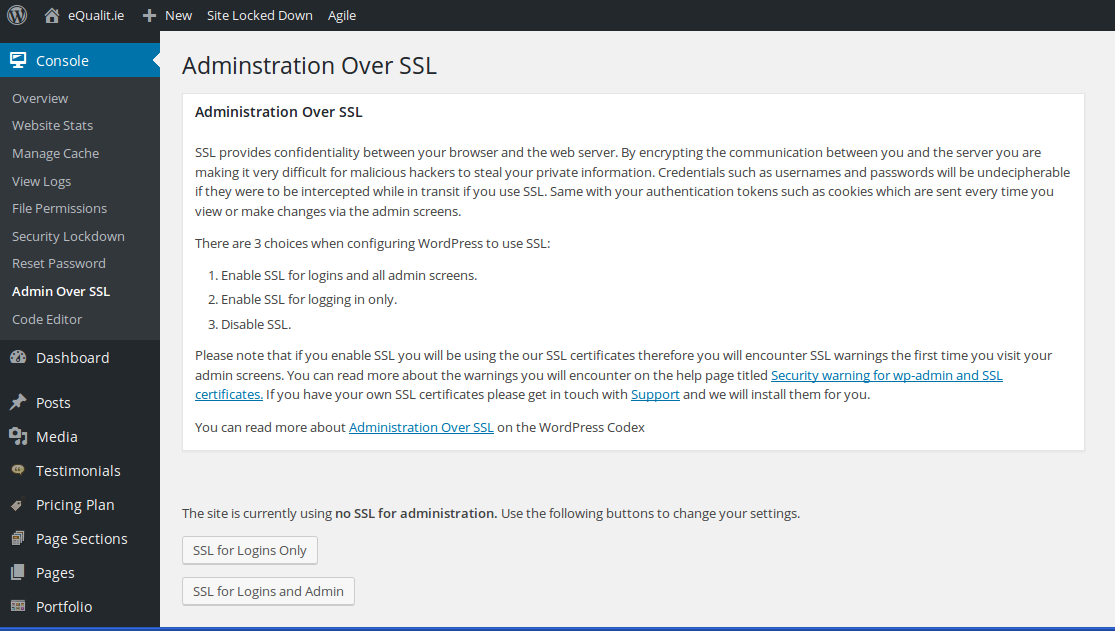 |
Please note that if you enable SSL you will be using our SSL certificates, and therefore you will encounter SSL warnings the first time you visit your admin screens. If you have your own SSL certificates, you can install them to solve this problem: please get in touch with the Deflect team through the Deflect dashboard and we will do it for you.
You can read more about Administration Over SSL on the WordPress Codex.
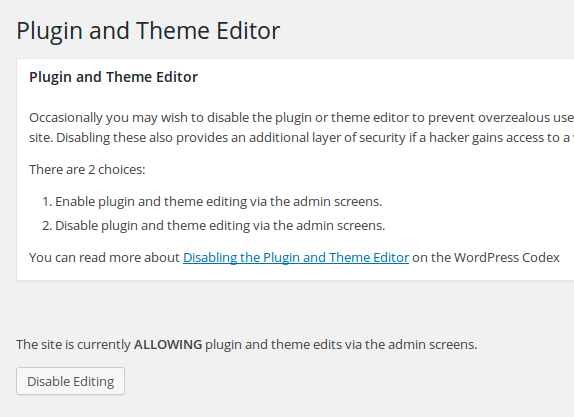
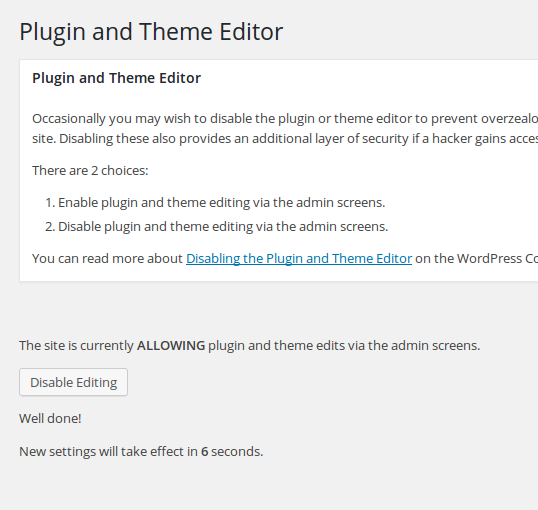
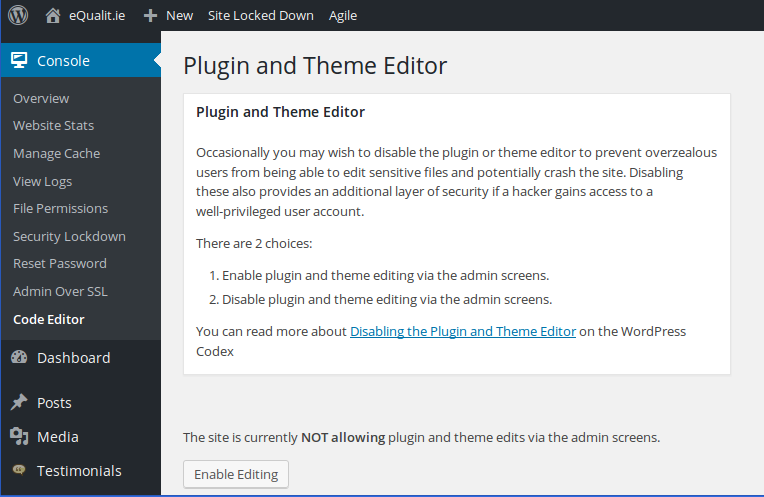
Disable or enable the Plugin and Theme Editor
Occasionally you may wish to disable the Plugin or Theme Editor in your WordPress admin panel so as to prevent overzealous users from editing sensitive files and potentially crash the site. Disabling the editor also provides an additional layer of security if a hacker gains access to a well-privileged user account.
There are 2 choices:
- Enable plugin and theme editing via the admin screens.
- Disable plugin and theme editing via the admin screens.
 |
 |
 |
Please note that for the changes to take effect you will need to wait until the end of the process before you leave the “Code Editor” page.
Read more about Disabling the Plugin and Theme Editor on the WordPress Codex.